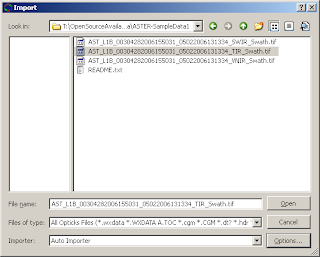
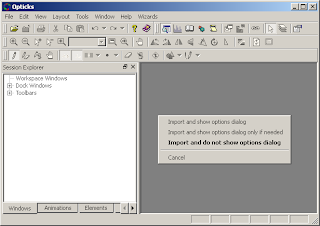
First, a quick reminder on how to bring up the Import dialog. You can click on the "Import Data..." menu item under the File menu. You can click on the "Import Data" icon that appears on the toolbar, see below for a screenshot. Or you can press "Ctrl+O" on your keyboard to bring up the Import dialog.

Looking at the import dialog, you will have the following options which I will be discussing further.

1. Importer Selection
This combo box is used to select the Importer that you like to use to load the data into Opticks. This is always defaulted to "Auto Importer". This is a special importer provided by Opticks that will query all of the other available importers in order to automatically determine the best importer to use. This combo box is provided in the rare circumstance that this auto detection logic is not sufficient and you would like to override it's importer selection.
2. Import Options
Clicking the "Options..." button will bring up the Import Options dialog. I'll be discussing this in more detail in a later Opticks 101 post. See below for an idea of what the Import Options will let you do:
- Subset or chip the image to exclude rows, columns and bands from being loaded.
- View and edit the metadata associated with image.
- Change the interleave and processing location (these will be explained in a later post, but have a large impact on performance).
- Select the datasets to load if a particular file contains more than one image.
- Fill-in the load parameters required for the "generic importers" (i.e. those need to load data from any Hdf5 file, and those required to load raw formatted files).
Clicking this button will bring up a preview of the image. See below for an example.

This preview will only show the first band of the image. This preview will show a small rectangle. You can drag this rectangle out and that will only select those rows and columns for load and exclude those rows/columns outside the box. This allows you visually select the region of the image you want to load. See below for an screenshot showing a selected chip.

4. Quick access sidebar
This pane can be used to store your favorite directories for quicker access. See below for a screenshot.

You can drag and drop directories into this pane. If you want to remove an entry from this sidebar, select it and press the "delete" key. To persist the changes, you will need to load something from the Import dialog.
Other Tips & Tricks
- Starting with 4.3.0, you can quickly load datasets or switch directories by typing directly into the "File name" field. You'll even get auto-complete as you type.
- You can change the default directory that the Import dialog starts it. You just need to edit the "Import path" setting in the "Options..." dialog available under the "Tools" menu. See the screenshot below.


